Thursday, November 5, 2015

Christmas Stockings - 2015

Every year our Knit Club makes Christmas stockings and gives them to the Women's Resource Centre for mothers and children that may be there over the Christmas season.  Local stores donate lots of goodies to stuff the stockings.  We make enough that there will be one for each bed and a few extras "just in case".  Some of the pretty ones are for the mothers and some are more for the children of all ages. 

So far this month I have done three.  Two are pictured below and the third is a work in progress which I will post when completed.

All the socks are made from the same basic pattern.  They can be done on a standard, mid-gauge or chunky/bulky machine.  Fairisle can be used, intarsia, beads or whatever strikes your fancy. 

This year I seemed to be fair isle inspired at least for the first two but the third one is completely different.  You will see soon.

The pattern if you wish to give it a try is here: Christmas Stocking Pattern

You can enlarge the photos when you click on them

 
This one was done on my LK 150 mid-gauge using my fair isle carriage.

 
This one was done on my Singer 360 Standard gauge machine using a punchcard.  I also did a tuck pattern on the cuff which had to be turned so the texture would show properly on the public side. 
 

The third sock is completed now so here it is!


A "Minion" sock for some little person who loves these silly critters!  I followed the basic sock with a black bar and blue foot.  The bib and straps were knit on later.  The eyes were crocheted and sewn on with a black round button in the centre.  The mouth was just embroidered on.  This was really a fun project.
 

Thursday, July 30, 2015

Spiral Hats

Some time ago I saw a TV program with a charming knitter showing how she made hand knit spiral hats.  I thought I bet this could be done on a knitting machine.  So I got out my trusty LK 150 mid-gauge and played around with it.

Because there was a lot of turning of the fabric I chose my garter bar to make things easier.  That said, one could easily do the same with a circular needle or waste yarn. 

Here are a couple of hats I made when practicing the pattern
 
 Here is one by a fellow machine knitter (Roz Porter) made along with a matching scarf - So pretty.
 
I can't remember who made this one but isn't it pretty - Love the top


A new knitting buddy, Taina from California, tried out my pattern and look how cute this one turned out.  Way to go Taina.  You can see more of her work on Ravelry under the name of honbun
 
If you would like to give this little hat a try here is the pattern I came up with  Spiral Hat Pattern

Monday, June 8, 2015

Socks & Slippers!

I had a fair bit of the Roselan yarn leftover from my little pouch pocket sweater project so I decided to use it up on a couple of small projects.

First I made my favorite slippers (Diane Sullivan's pattern from "Footnotes") using my LK 150 once again.  I found some cream Roselan to use for the inside lining.  Just love these slippers - so easy to make and no sewing!!!  Another great Sew As You Go project


Then I still had yarn left so went ahead and made a pair of bed socks for me - again Sew As You Go project.  Got a little fanciful with a little cream stripe or two in the cuffs.  


The Roselan isn't a really soft cushy yarn so I washed the socks and that did the trick - much better.

I still have some Roselan left - mmmmm I wonder what I'll use that for?  I'm sure something will come to mind soon.

While in "Sock Mode" I made a couple of pair using odds and ends of yarn just to use it up.

 
This pair was knit flat and has a side seam and the yarn was left over from my shawl project.

 
This pair are Sew As You Go - Unsure of the yarn used.

Next on my agenda is 10 pairs of mittens for the Red Cross Winter Program that will be handed in to them in September.  These are done on my Studio 155 with ribber (bulky 9.0 mm).  May incorporate some nice fair isle designs this time.

Also have some beautiful blue yarn I want to use for a cardigan for myself. 

Stay tuned!


Sunday, May 24, 2015

Child's Raglan Sleeve with Pouch Pocket

I found this little pattern in one of Irene Wood's books "LK 150 Classics - 19 Patterns for Men, Women and Children" and thought I would give it a try.  This pattern works up very quickly so I decided instead of having a lot of hand manipulating of a centre panel on the front I would put my garter bar to use and do a simple pouch pocket. 

Great granddaughter has hinted she would like a sweater with this pocket feature so this will be my trial run until I get her measurements from her mom (my oldest granddaughter).  I followed the instructions for a size 6.

I used a single strand of Bramwell Roselan on my LK150 at T3 and it was just like knitting through air!  I love that yarn and so did my machine!  I have enough left to make a pair of socks or slippers to go with the sweater.  I didn't start with a full cone so I really don't know how much yarn I actually used.

Here a couple of photos of the final product.  I am rather pleased and hopefully it will fit.  If not it will go into my Charity Box and a larger size made for Evalynne.  These little ones grow so fast it is hard to keep up with them!

 
Just a simple sweater with raglan sleeves (my favorite) and a pouch pocket

 
Closer look at the pouch pocket without the sleeves inserted.

Here is a photo of the book cover from which I found this cute pattern.  If you need a good starter book this would be a good one to add to your collection if you can find one.  I've had this book for a very long time and not sure if it is still available.


Irene Woods can be contacted on her website http://clearwaterknits.com.  Take a look at her blog.  There are lots of great inspirations there to get those knitting juices going.  On her blog there is a section to contact her if you require more information. 

I personally own many of her books and find them very easy to follow as I work through one of her patterns.

Saturday, May 9, 2015

Knit Club Project for April was a Shawl

In April our knit club decided we would take a basic shawl pattern and attempt to make it using a punch card or hand manipulating stitches to create something pretty but serviceable.  Members were encouraged to make changes to the basic pattern - no holds barred on this project.

Our member Krys did a great presentation offering a pattern well in advance of our knit-in to encourage our members to try something on their own.  Work with punch cards or hand manipulation patterns that weren't being used normally.  In other words "something different" that was also a bit of a challenge.  They could either start it at home to complete at our knit-in or start from scratch at the knit-in and possibly finish at home.

Krys showed many samples of her shawls using tuck and fairisle.  Photos hopefully will be made available for me to put up on my blog.

I decided to work with my LK 150 for this project.  The yarn I chose was James C. Brett's Baby Marble Double Knit color BM5 (produced by Monarch Mills In England - his website is www.jamescbrett.co.uk if you are interested in this yarn now available here in Canada and probably in the U.S.A. as well).  

The yarn has a grading of color from cream through shades of beige to brown then pale to dark blue.  This was a beautiful yarn to work with as it seems to love tension 4.  The carriage slid back and forth easily throughout the project.

Now bearing in mind that lately it seems I can't have too many things going on at the same time throughout a project I'm knitting I decided to keep it simple and utilize some tools I should be using more often.  One of which will transfer every other stitch over nine stitches at the same time and also my garter bar was an option as well.

On the left side of the shawl I followed Diana Sullivan's "Decorative No Roll Edge" that she showed  to us in April and it really works - go to https://www.youtube.com/watch?v=XztMJV4ERBo and you will see for yourself.  Thank you Diana for this great gem of a technique.  I will most certainly be using it I the future.

I worked on an eight row pattern.  Starting with 8 rows of stockinet stitch then transferring every other stitch but leaving 6 stitches on the left to do the Decorative No Roll Edge and increasing and or decreasing on the right keeping five stitches unworked in pattern throughout.  It really turned out quite nice - I have blocked it but still think I'll do a crochet edging along the ends and bottom of the shawl just for added length and weight.  I used almost all of two 100 gram balls on this project so far so any additional edging will get the third ball involved for sure.

Here are a couple of photos of the shawl so far.  Updates to come with hopefully more photos of what our members have come up with at our May meeting!   Click on the photos if you wish to enlarge them.


Front folded

Diana Sullivan's Decorative No Roll Edge!

Back Folded
 
Shawl folded in half
 
Finished the soft scalloped edge

Close up view of scallop edging (crochet)


The only way I could figure to show the whole shawl was to drape it over the back of my sofa.

Friday, March 6, 2015

Tea Cozy

Recently I saw a cute toque in one of my knitting newsletters.  I was in need of a new tea cozy and thought this would be a very cute project for a wintery afternoon.  So I wound up some yarn, settled down to my Singer 155 and decided to try 2 x 2 rib for the main sections of the cozy.  The pattern indicated casting on 38 sts and knitting about 7 inches (this was for the hat).  So I set up for the tea cozy over 35 needles and knit a length of 40 rows for about 8.5 inches.  Transferred the sts from the ribber to the main bed and knit one row of stockinette.  Took the stitches off on garter bar but you could take them off with waste yarn.  Made another exactly the same.

The next step was to hang both sections side by side on the machine over the 70 stitches.  I knit 4 rows then I transferred every third stitch to make eyelets.  Put all emptied needles back in work and knit 4 rows ending with COR.

Now this is the fun part!  Put all stitches except 4 on the carriage side to hold - and set carriage to hold as well.  Now knit 20 rows or whatever length you want.  Keep weight on the i-cord you are making and just knit in plain stockinette.    Hang a claw weight under the long i-cord you just made (beneath the needle bed) put next four needles to the left in work position. and then transfer the four with the I-cord on them to those needles and knit another 20 or so rows.  Continue with this all the way across. When you come to the last four do the transfer as usual and knit one row at a higher tension and then crochet cast off last 4 sts.

Finally I made another I-cord over 3 needles for 80 rows and used this to weave in and out of the eyelets I made earlier.  Pulled it tight making sure all the loops are out and on top.  Tie the i-cord securely and make a nice little bow.

Then I seamed the sides to accommodate the spout and handle on my teapot.  Got all the ends sewn in and voila a cute little tea cozy.  I think I have fallen in love with 2 x 2 rib now!  Love it!

Here it is:

Saturday, February 7, 2015

Hand Knitting for a Change!

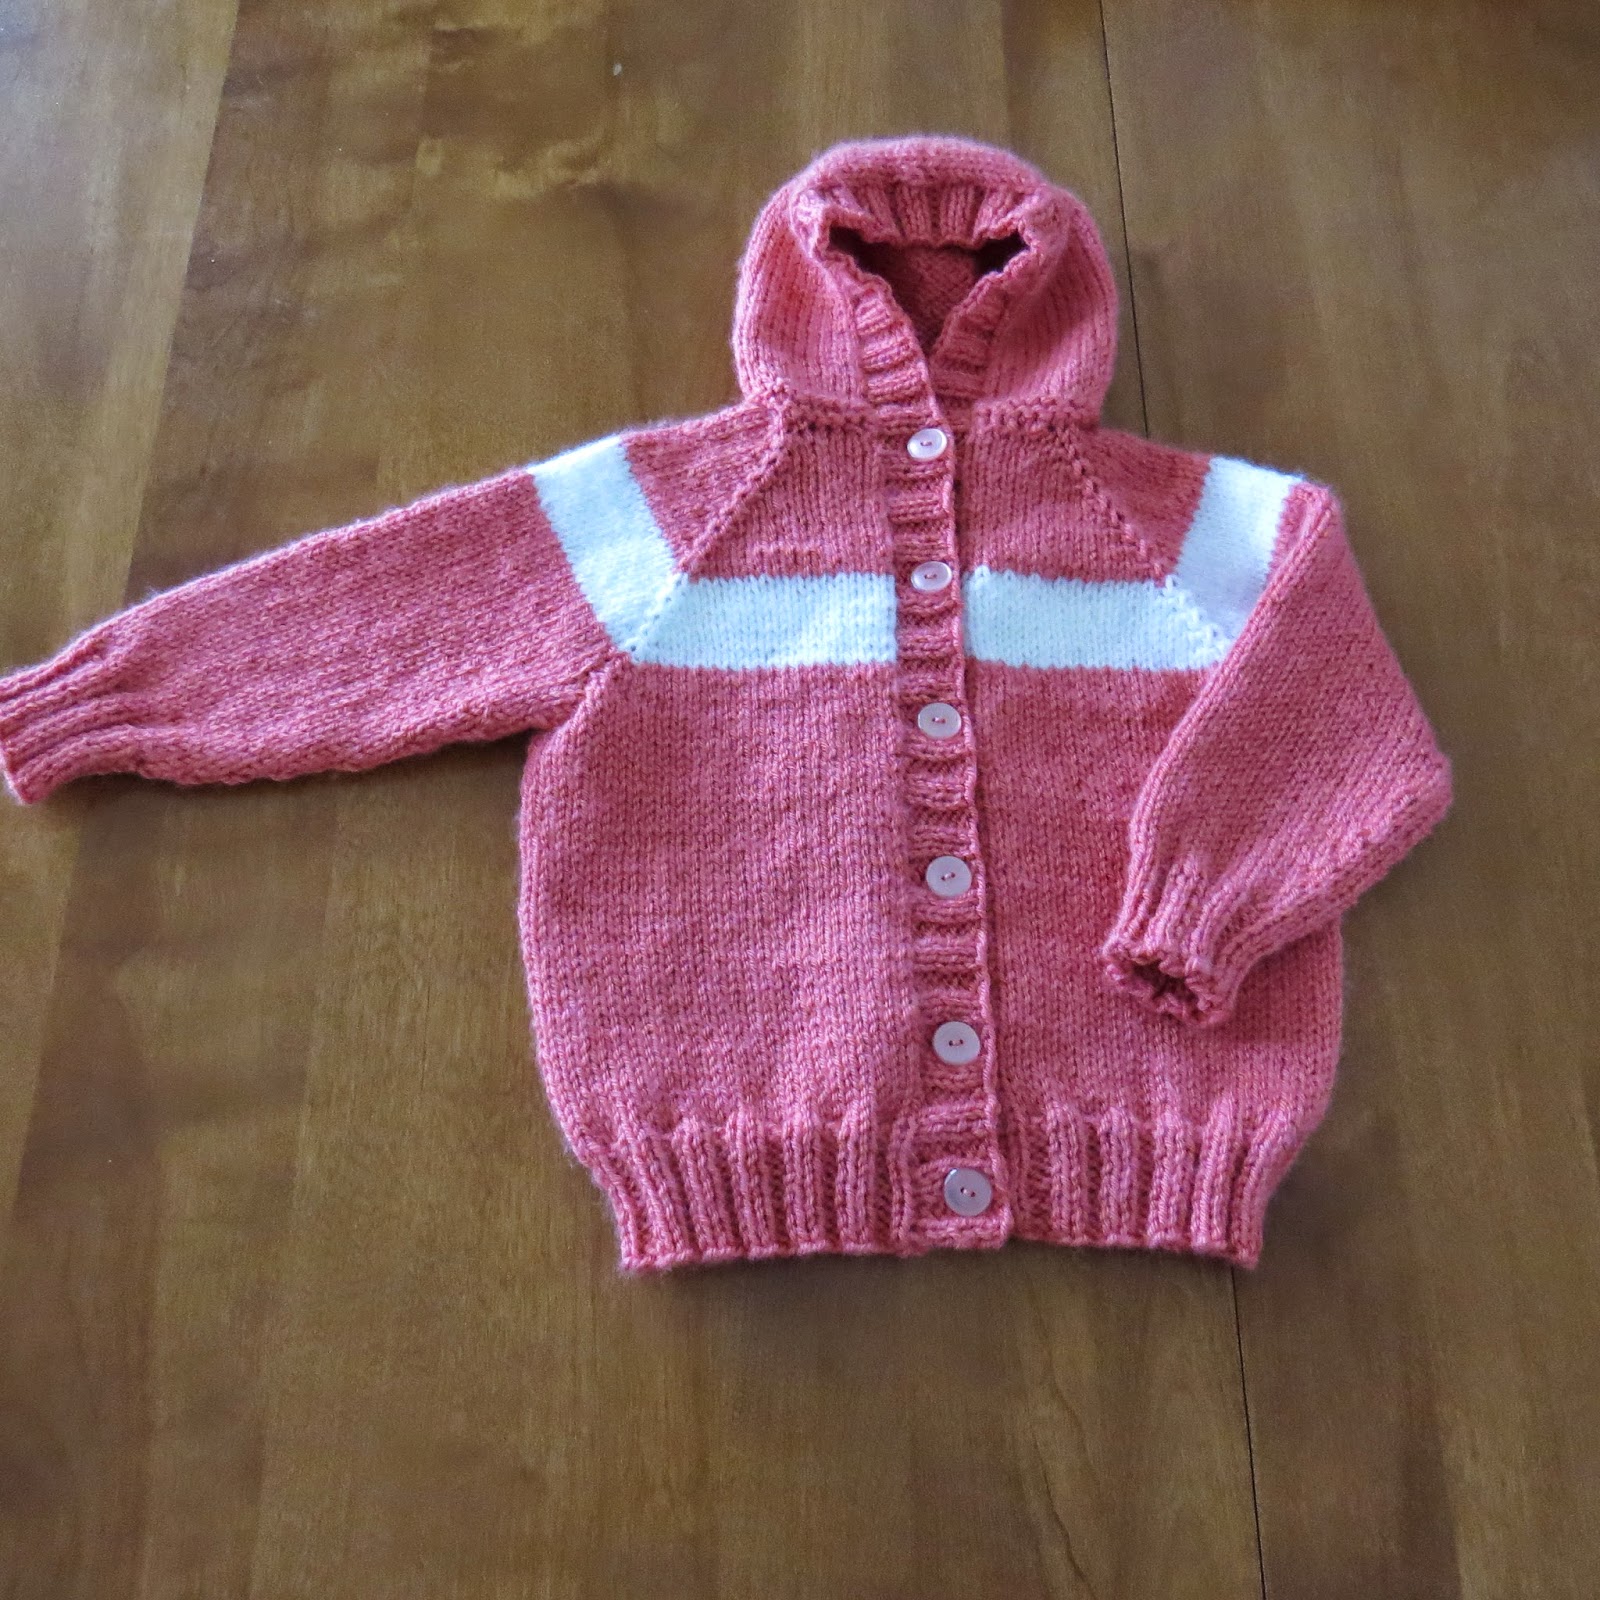
I found this adorable little hoodie pattern and as I wasn't able to do much with my machine knitting due to feeling a lot under the weather so I decided to amuse myself and knit this little gem.

I used Paton's Canadiana yarn which made up a lovely warm hoodie that I think might fit my great granddaughter Evalynne.   If not I can always make it again in a larger size.  She is very petite and I'm hoping this one will do.  Needles used were 4.5 mm and 4.0 mm. 

The pattern can be located here if you want to give it a try.  http://www.ravelry.com/patterns/library/toddler-raglan-hoodie  - it is a free pattern.


Here is the front view
 
Here is the back view

 
I really liked the garter stitch around the neck area and hood shaping

 
The button and buttonhole band and hood trim was all done at the same time


This sweater is knit from the top down so only seaming was under the arm and sleeve seams.  I especially liked the shaping of the hood section and the button/buttonhole band.  I actually enjoyed the increase sections creating the raglan effect - really quite attractive and somewhat different from the others I have done that leave a hole (which is fine) but this was interesting.
 
All in all I enjoyed making this one and would probably make others.
 
It was too small for my great granddaughter so I found the perfect little one to have it.
Here is a photo of my nephew's little girl wearing it!  She is so adorable.